Duration: 1 month
Team: me
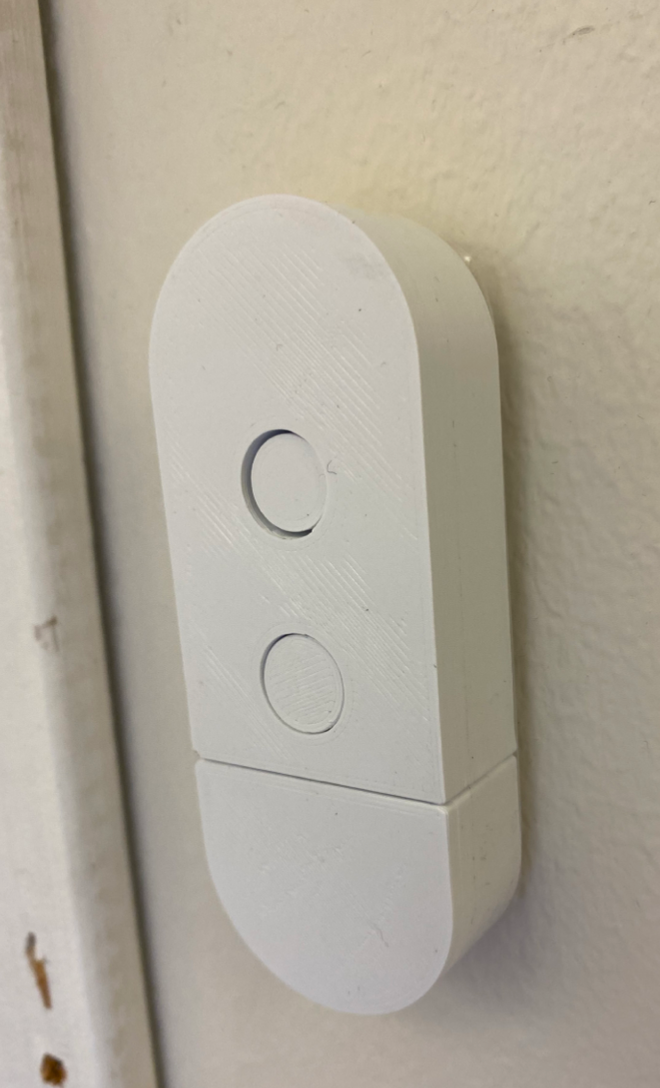
The task was to design a light switch with the best tactical feel and function. I chose to focus on the clicking feel of the buttons, smooth changing of the battery and easy mounting. The parts are 3D printed iteratively to fine-tune how the different parts work and fit together.
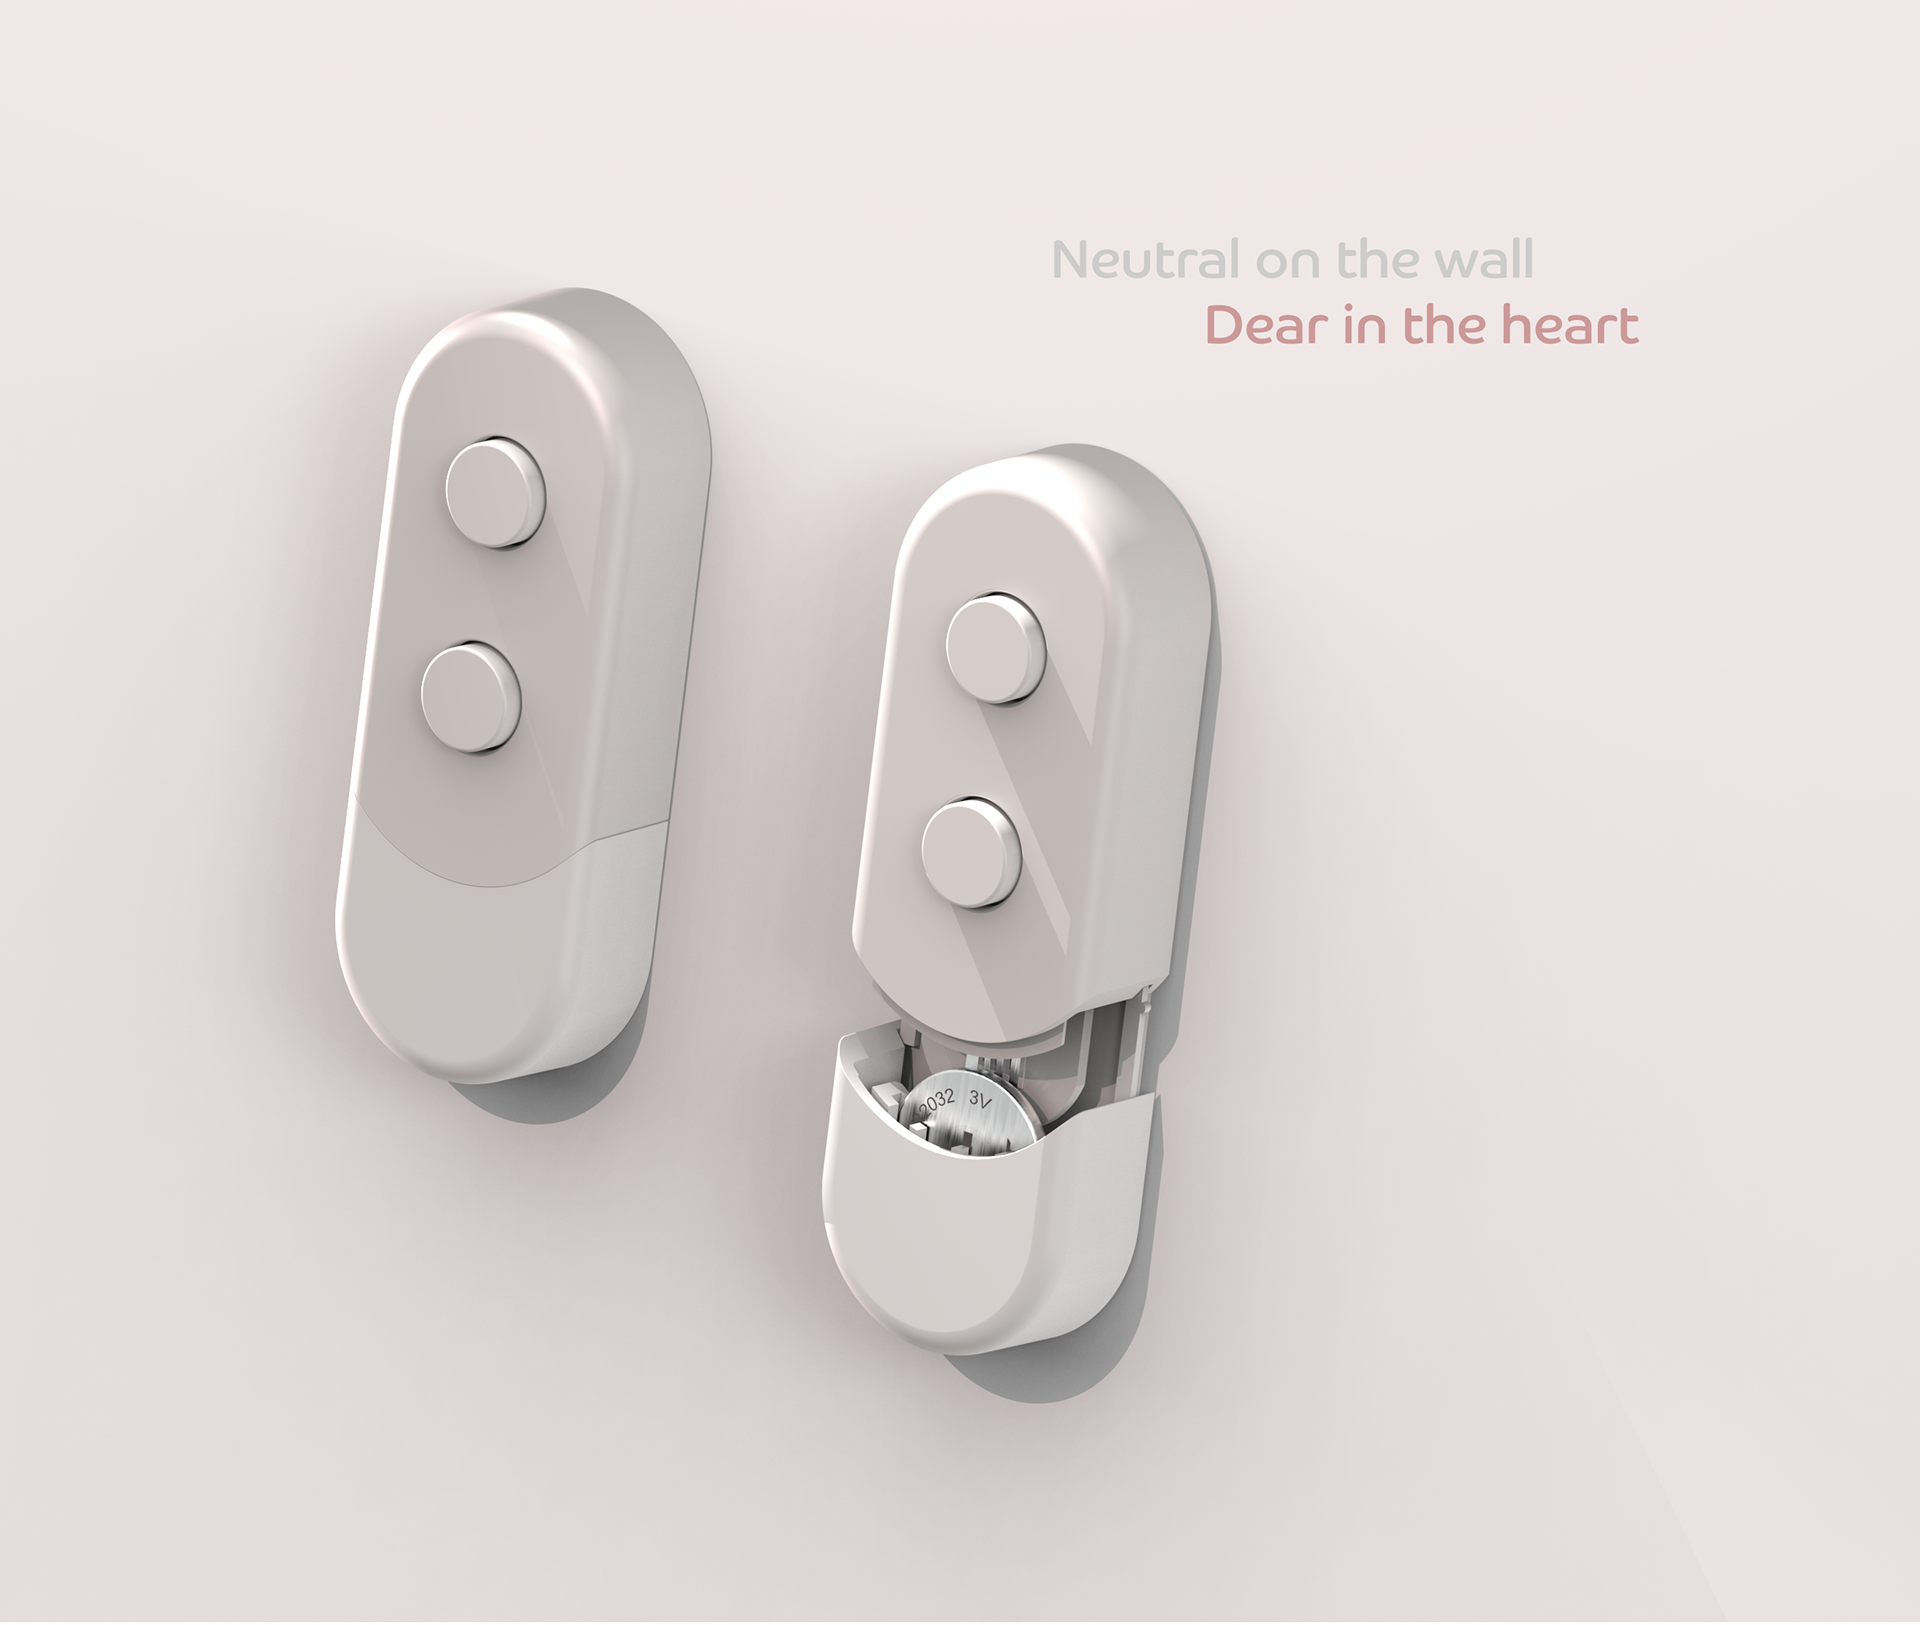
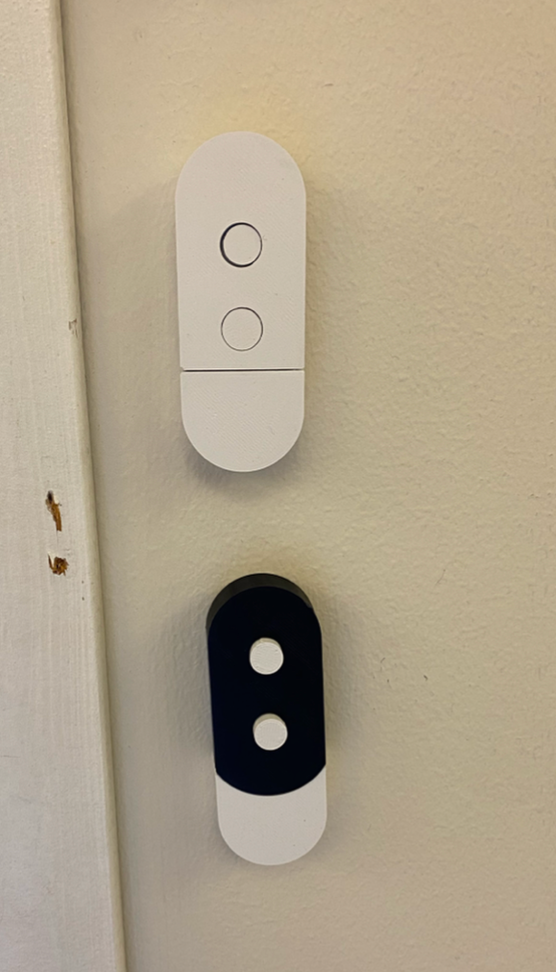
I chose a neutral colour scheme to fit any type of wall
Design iterations, hover over images for more information on thought process:
Too short buttons
Cleaner cut with curved line

Colors on the sides of buttons

Signaling with different color focus
Open cabinet?

Slide down?
Design iterations to make every part fit snuggly and work seamlessly
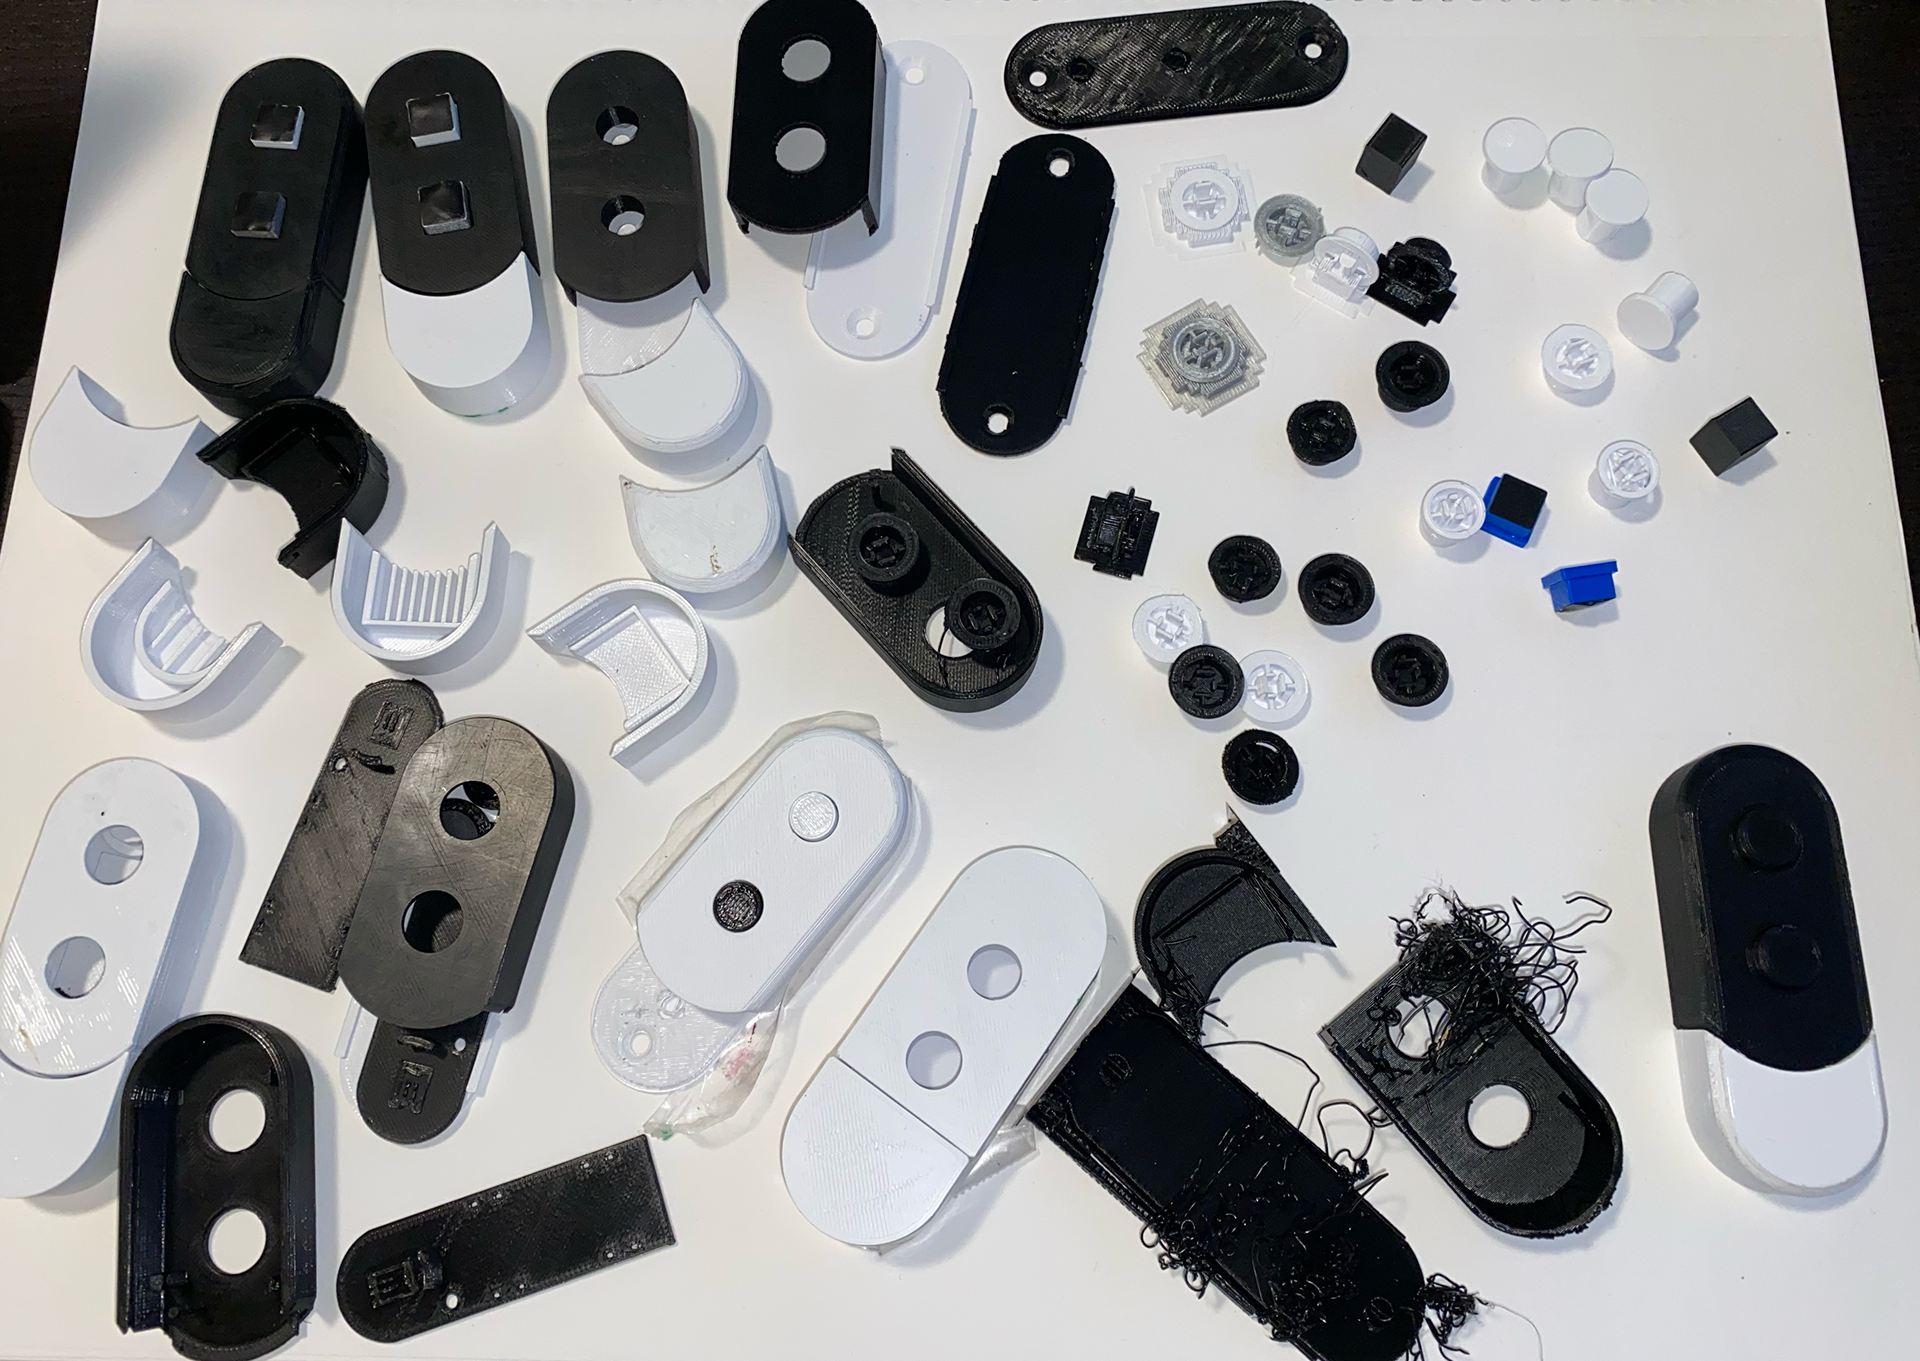
Different concept designs for battery and button functionality, including gameboy style, flip switch, screw cap, traditional styles, guitar string, push pull button, geometric styles and rotating switch.


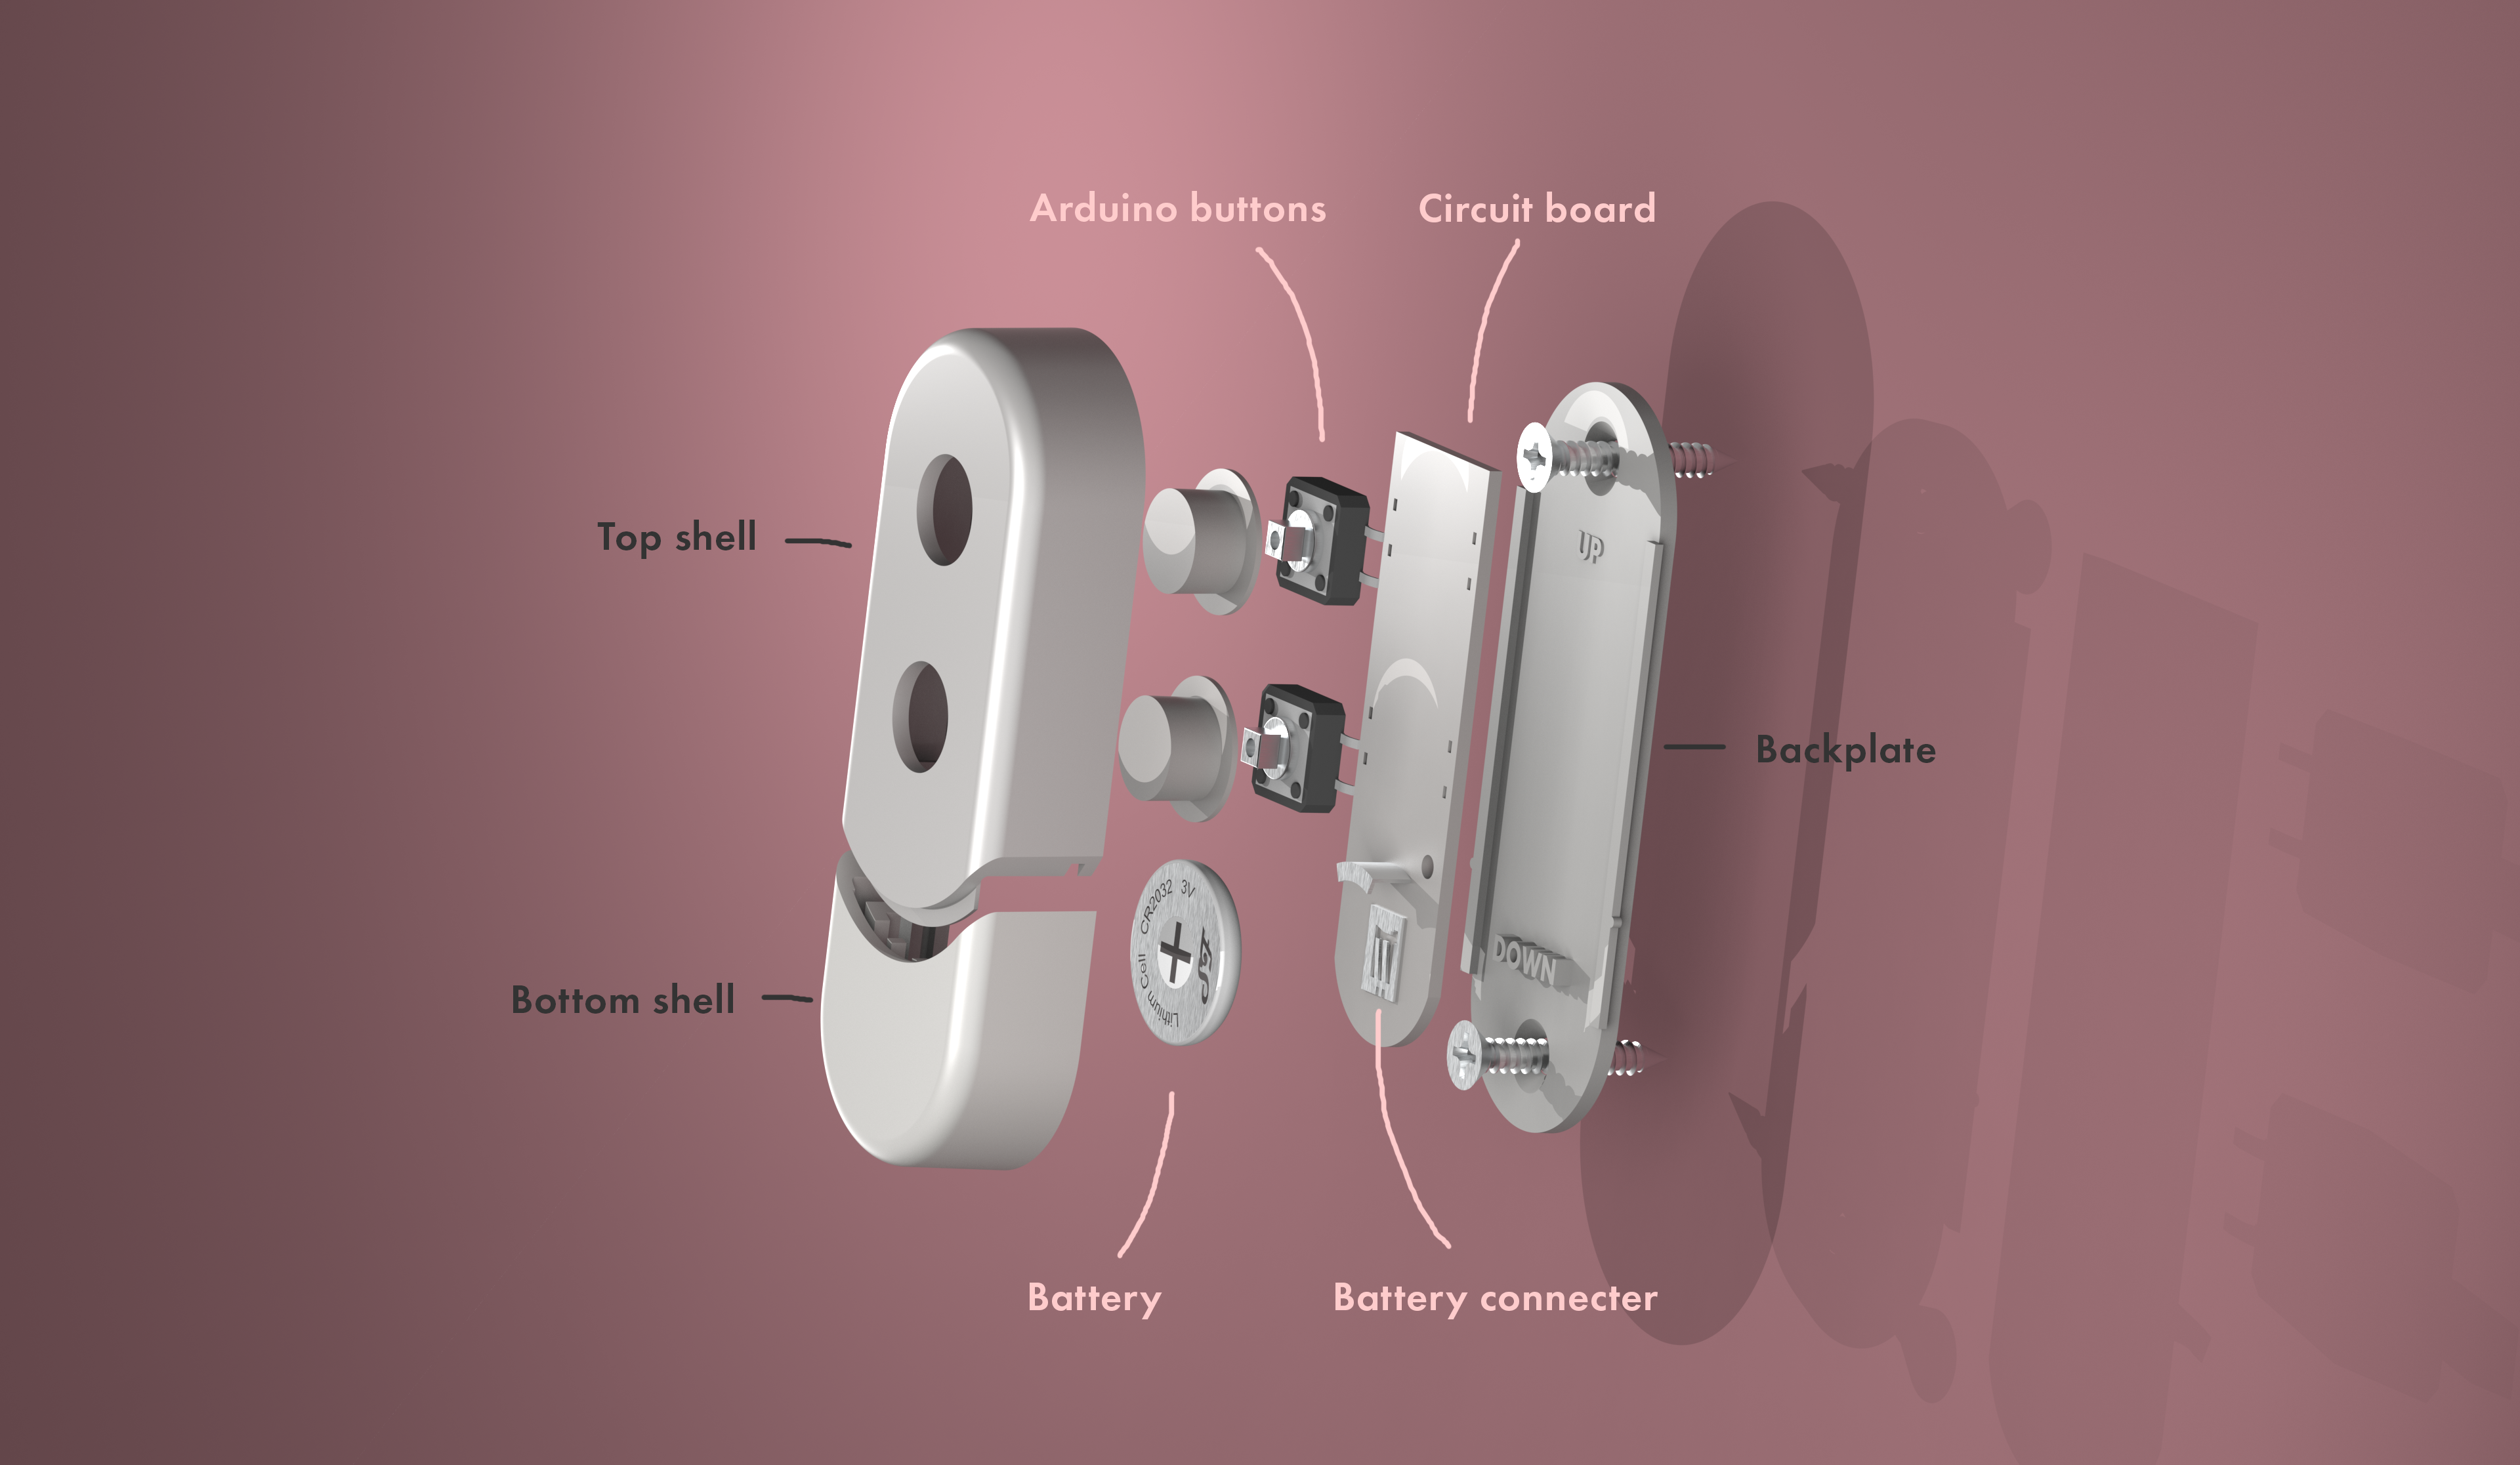
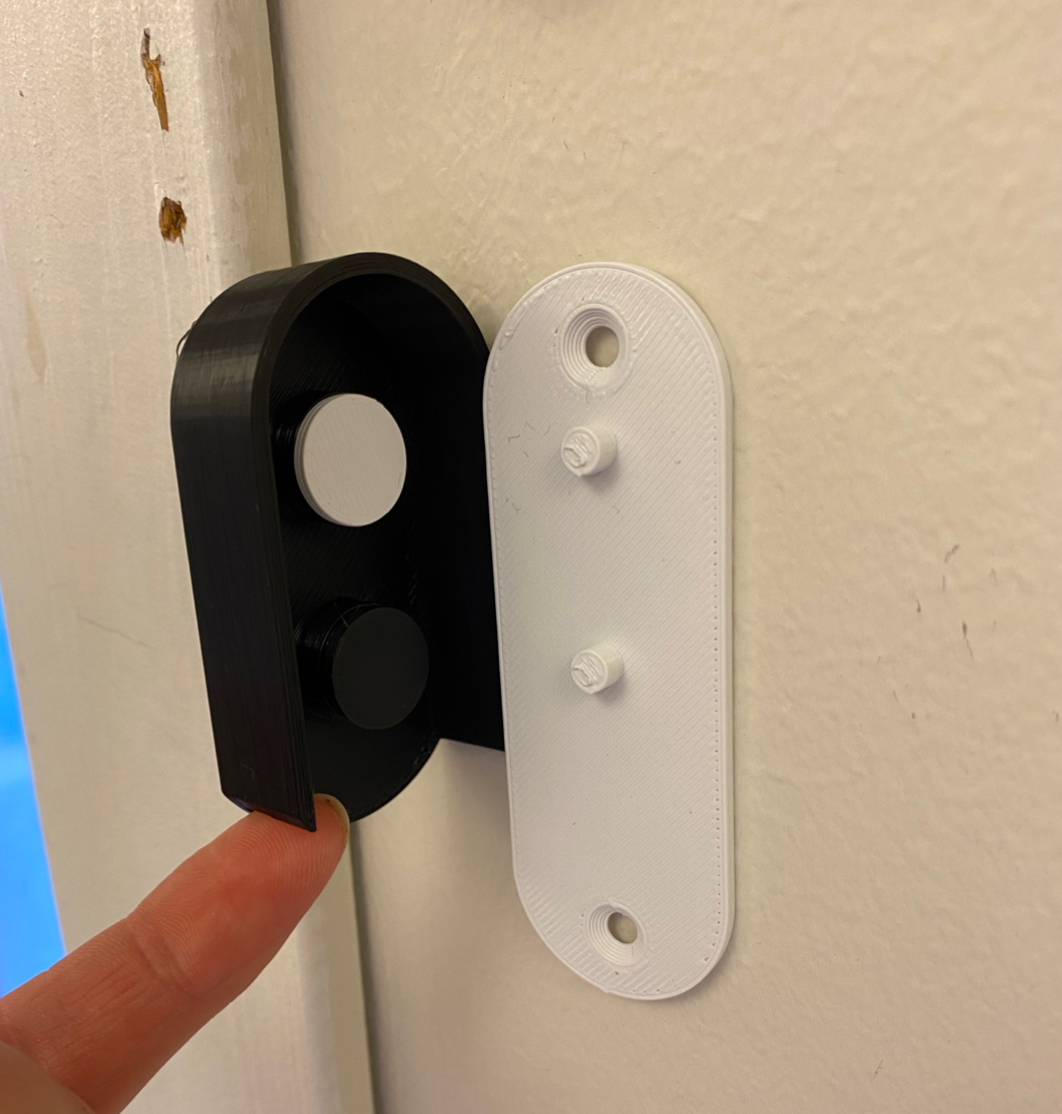
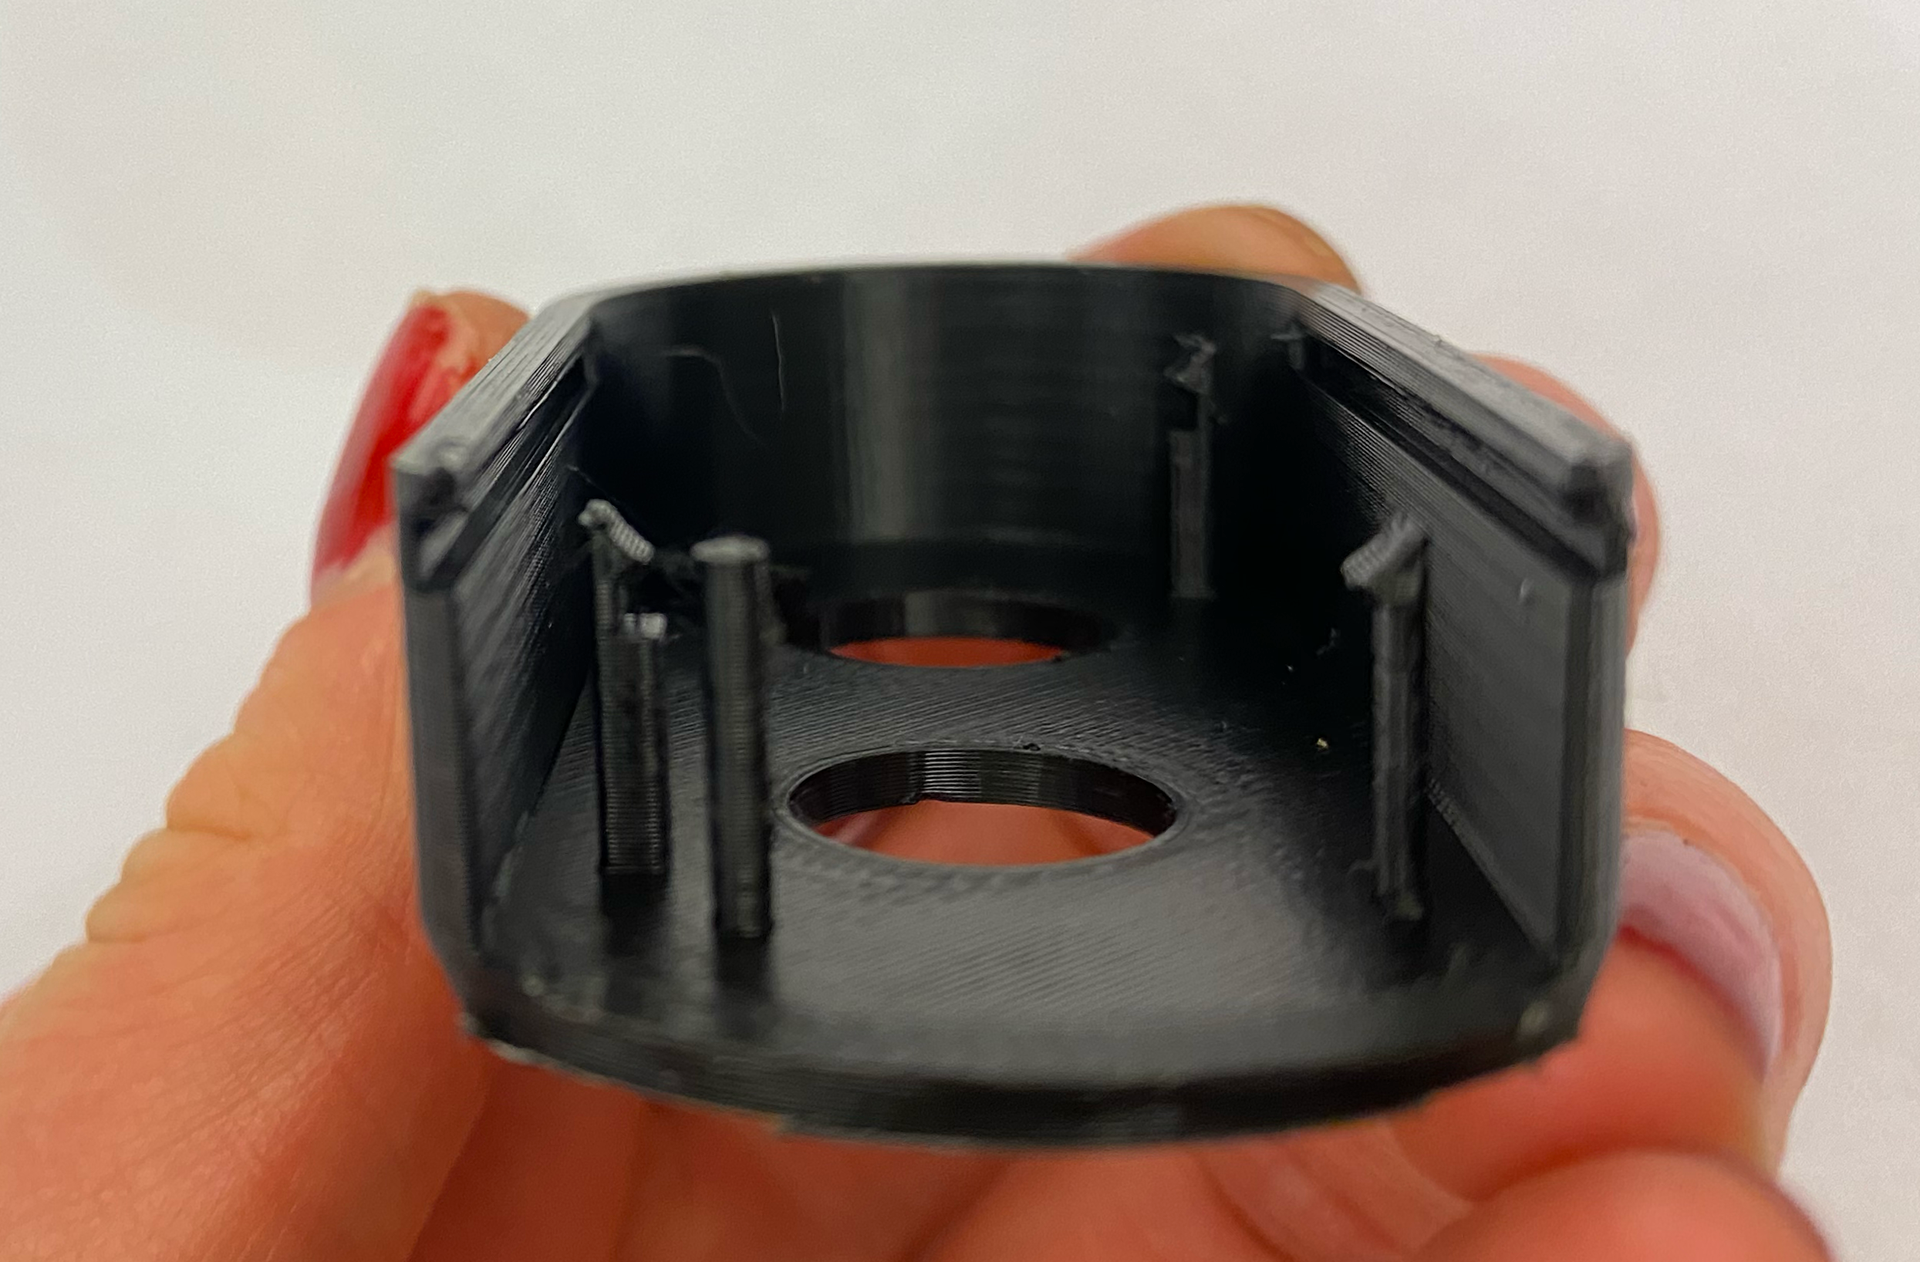
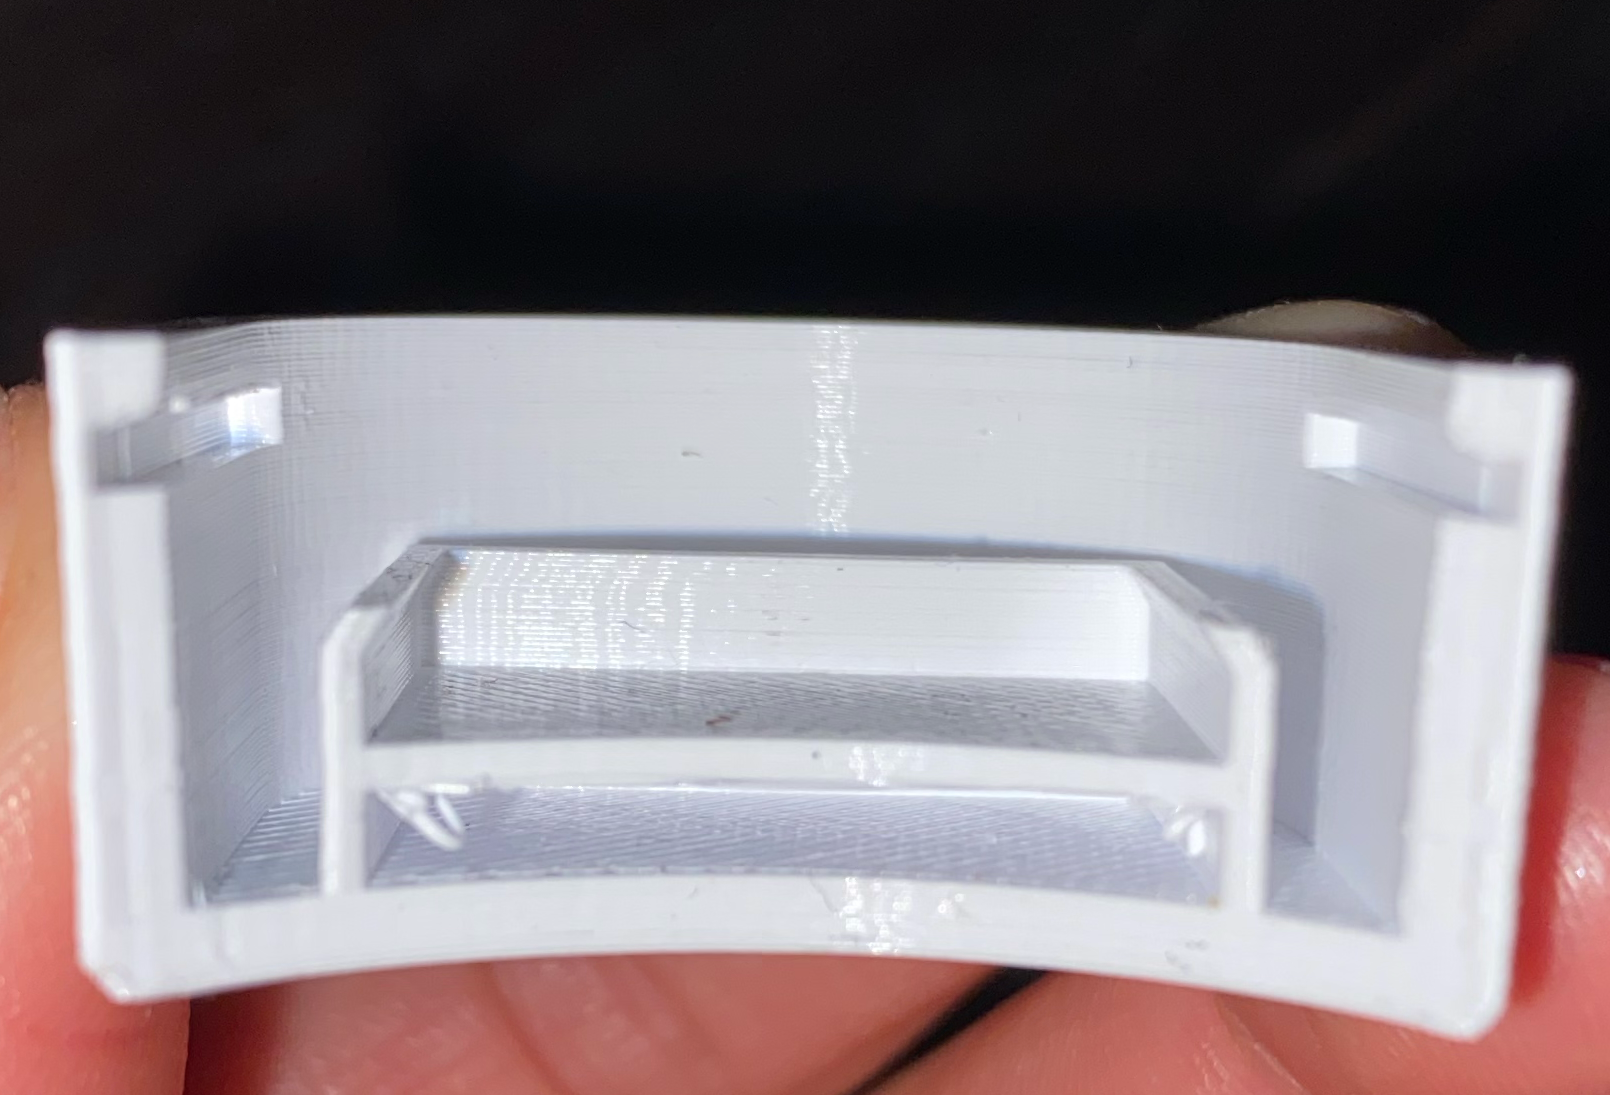
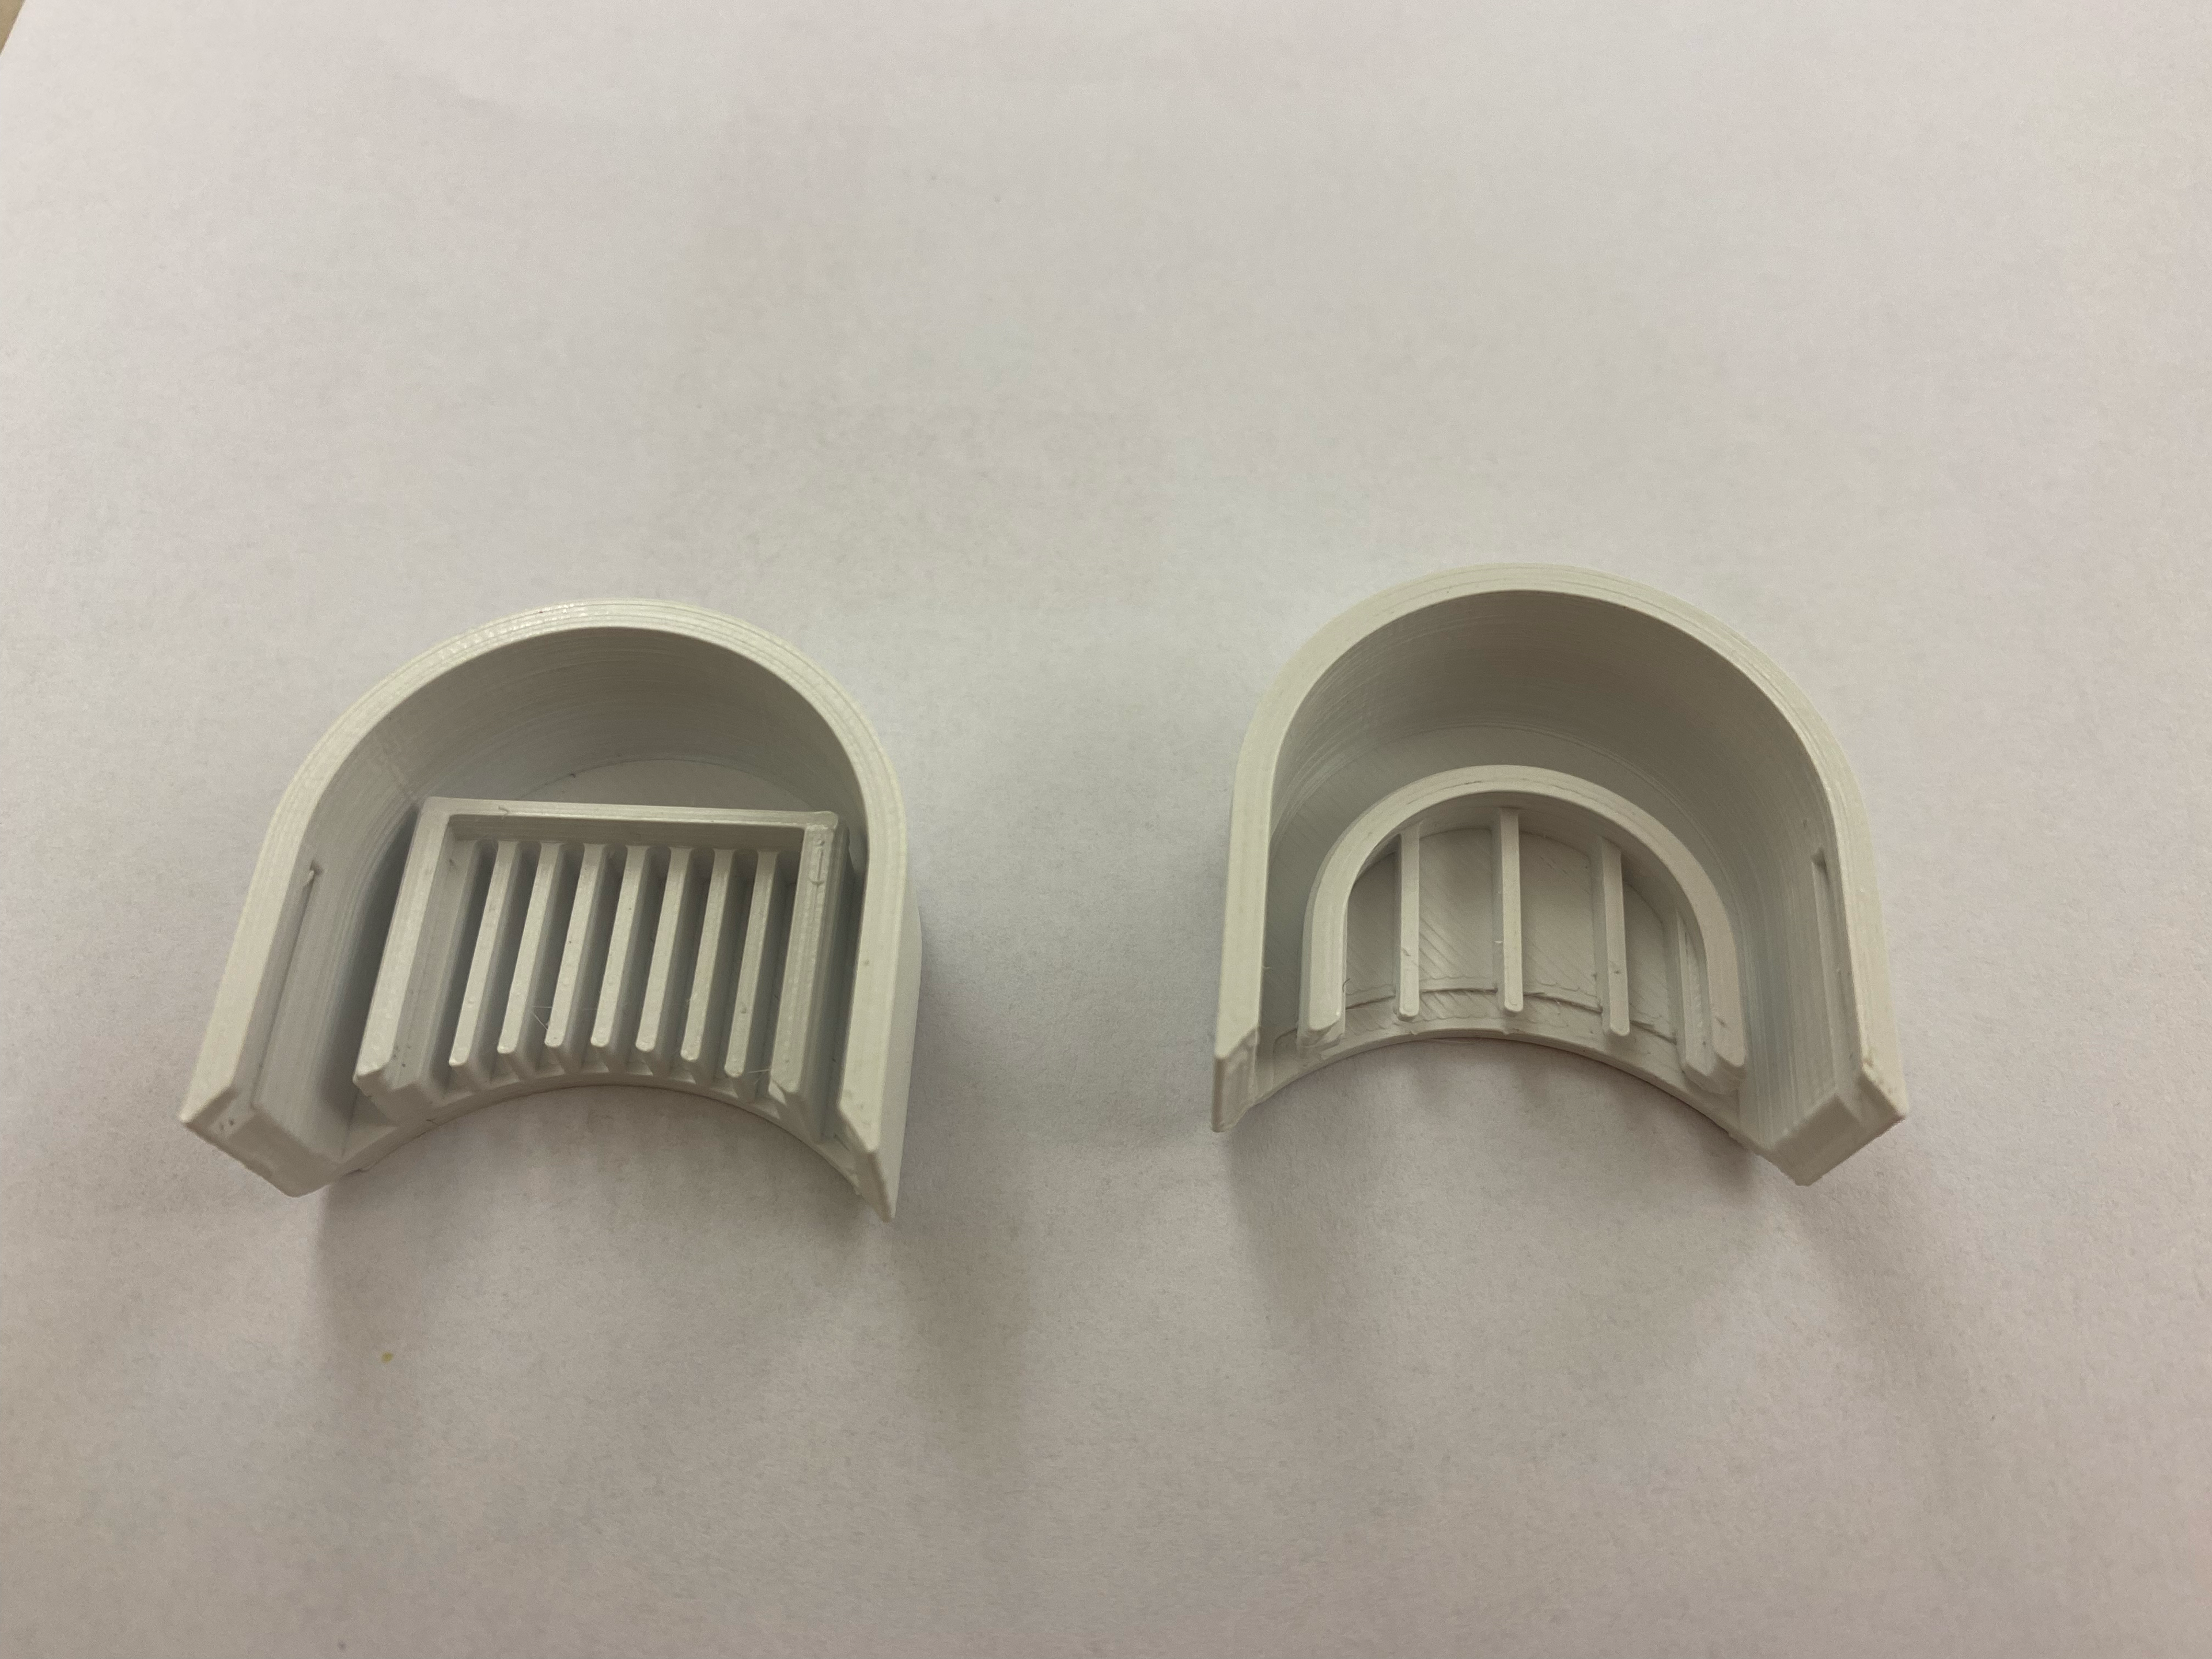
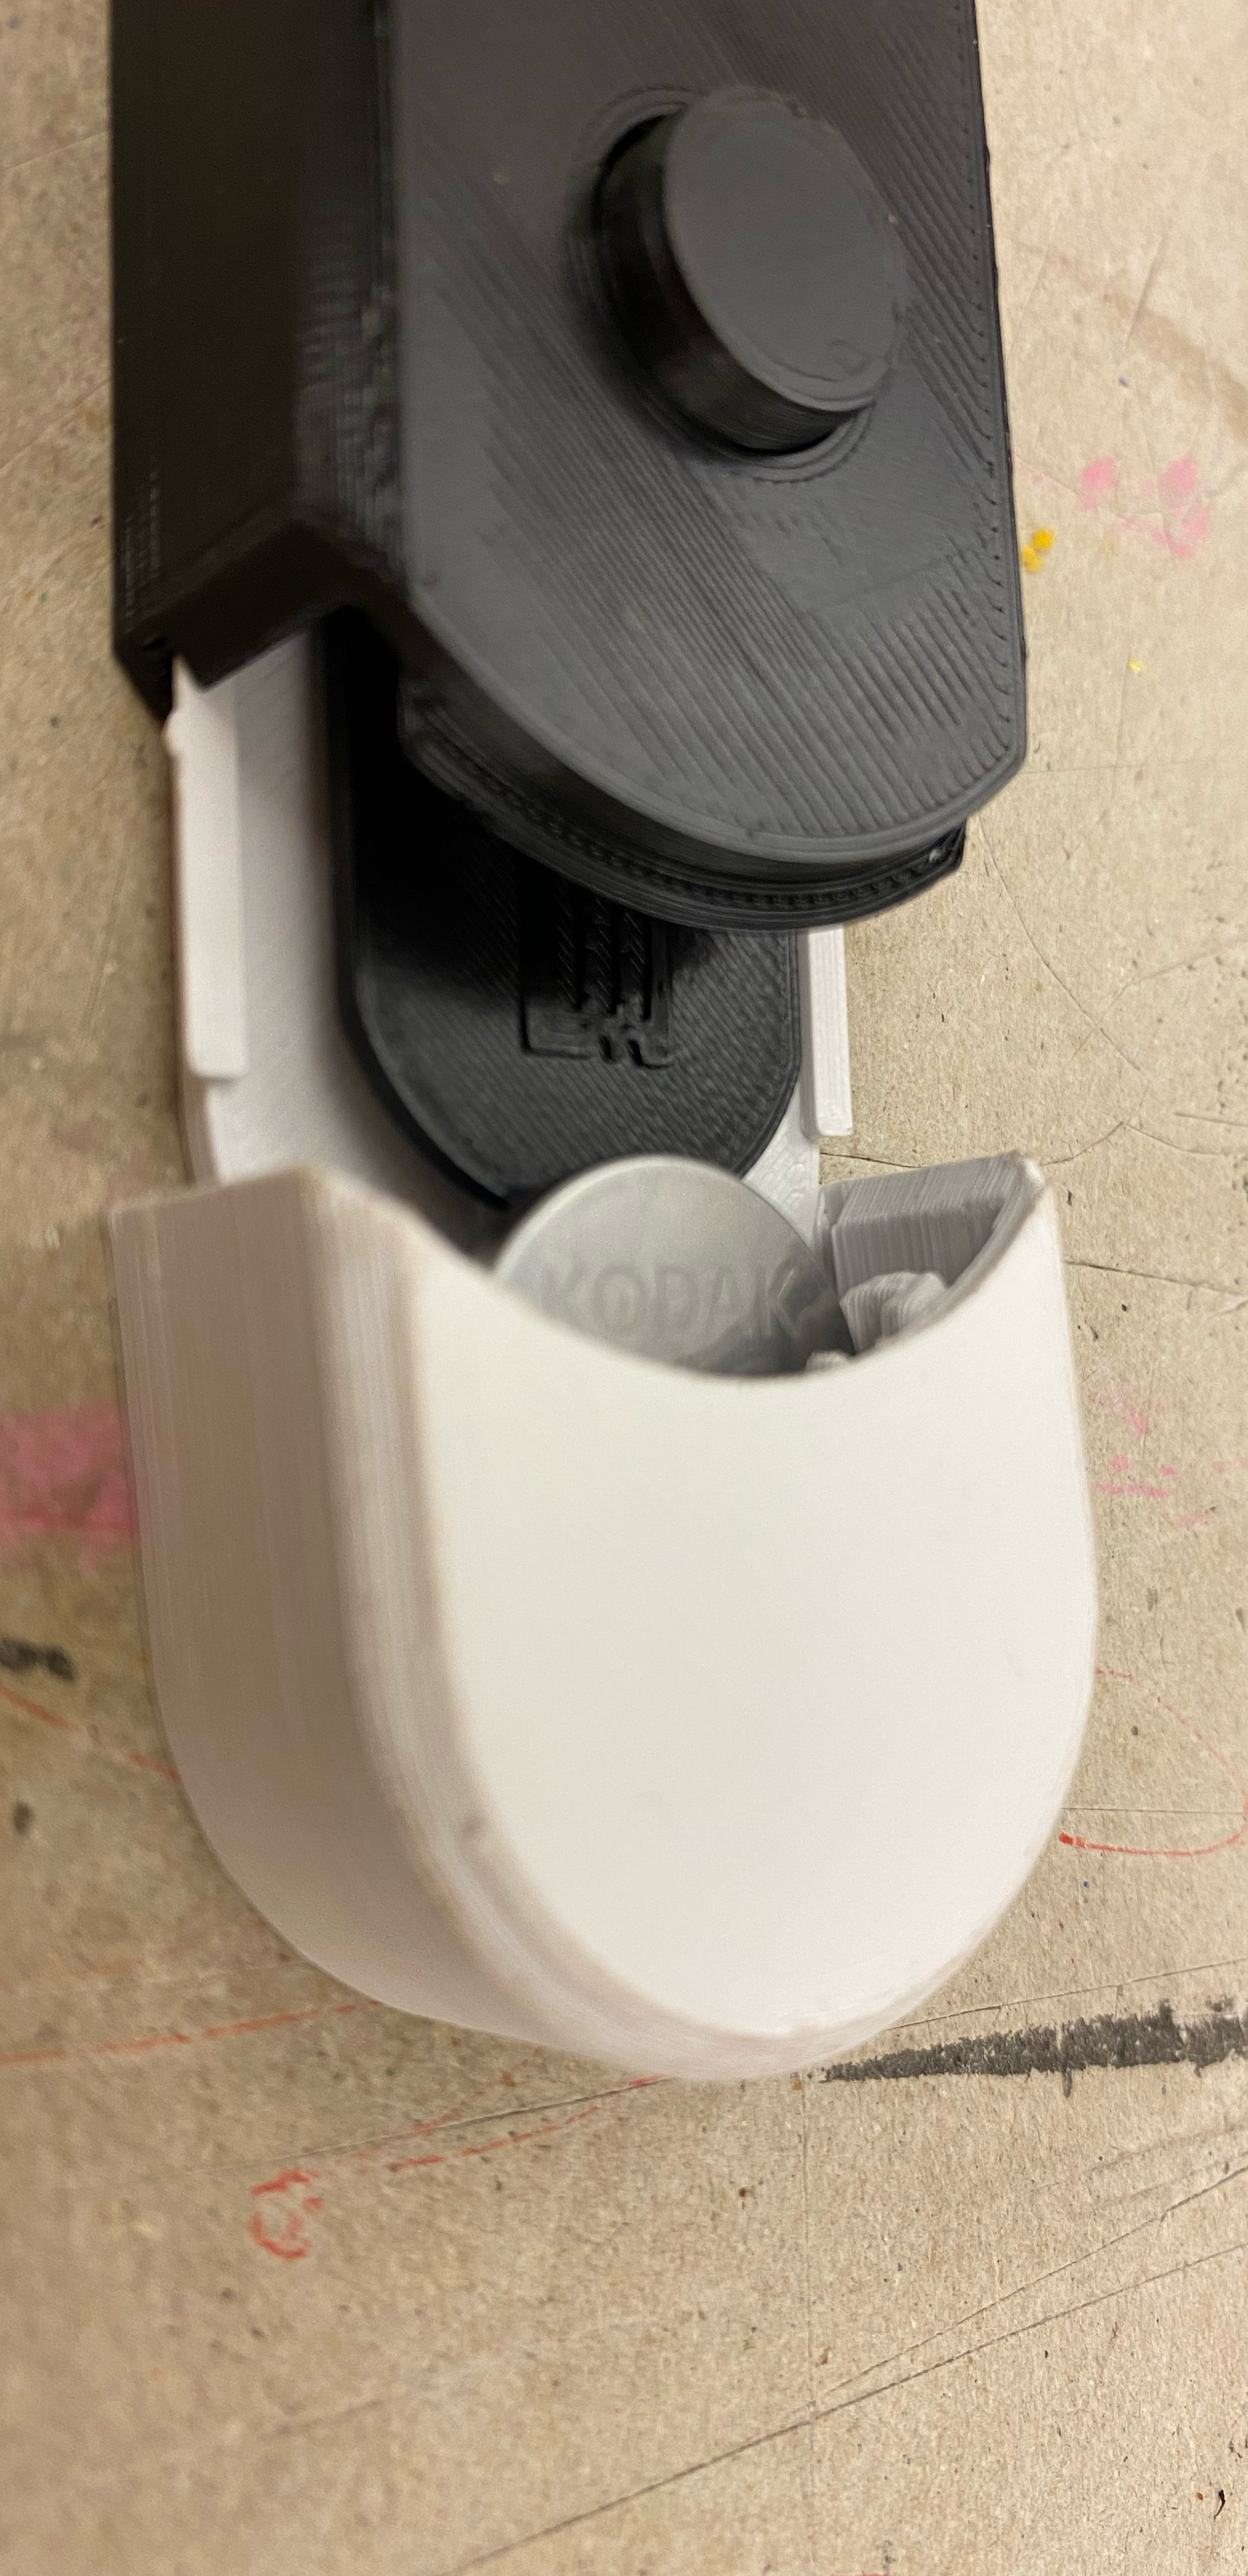
To make the parts fit so that the buttons have the best height for tactical feel, I created snap pillars to hold the circuit board, this also kept the cables out of reach for a safer mounting
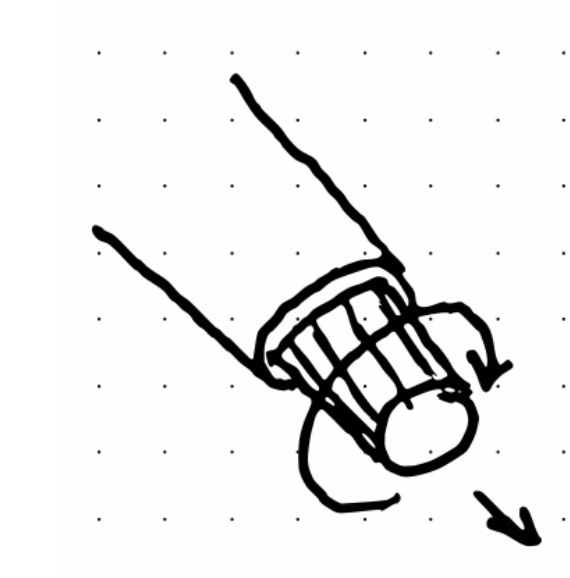
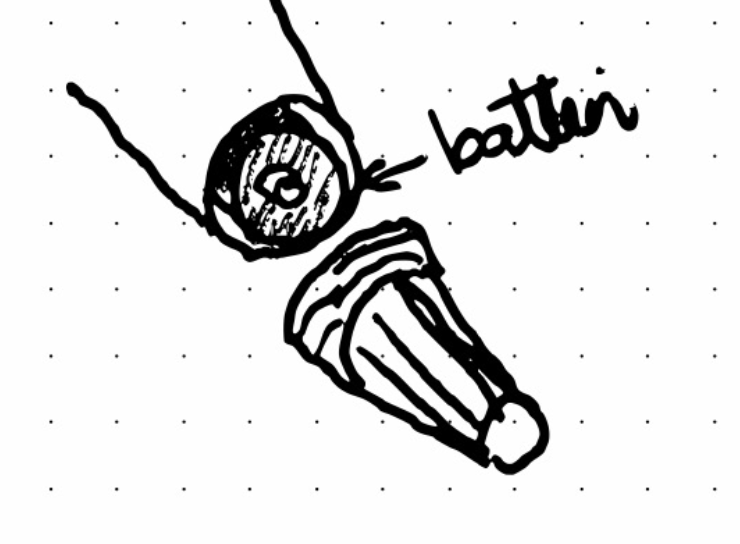
Battery capsule for easy changing, by leaving the main part on the wall and only sliding off the bottom cover with the battery (hover images for thought process)
Hard to tell where to put the battery
Using less material and more intuitive design
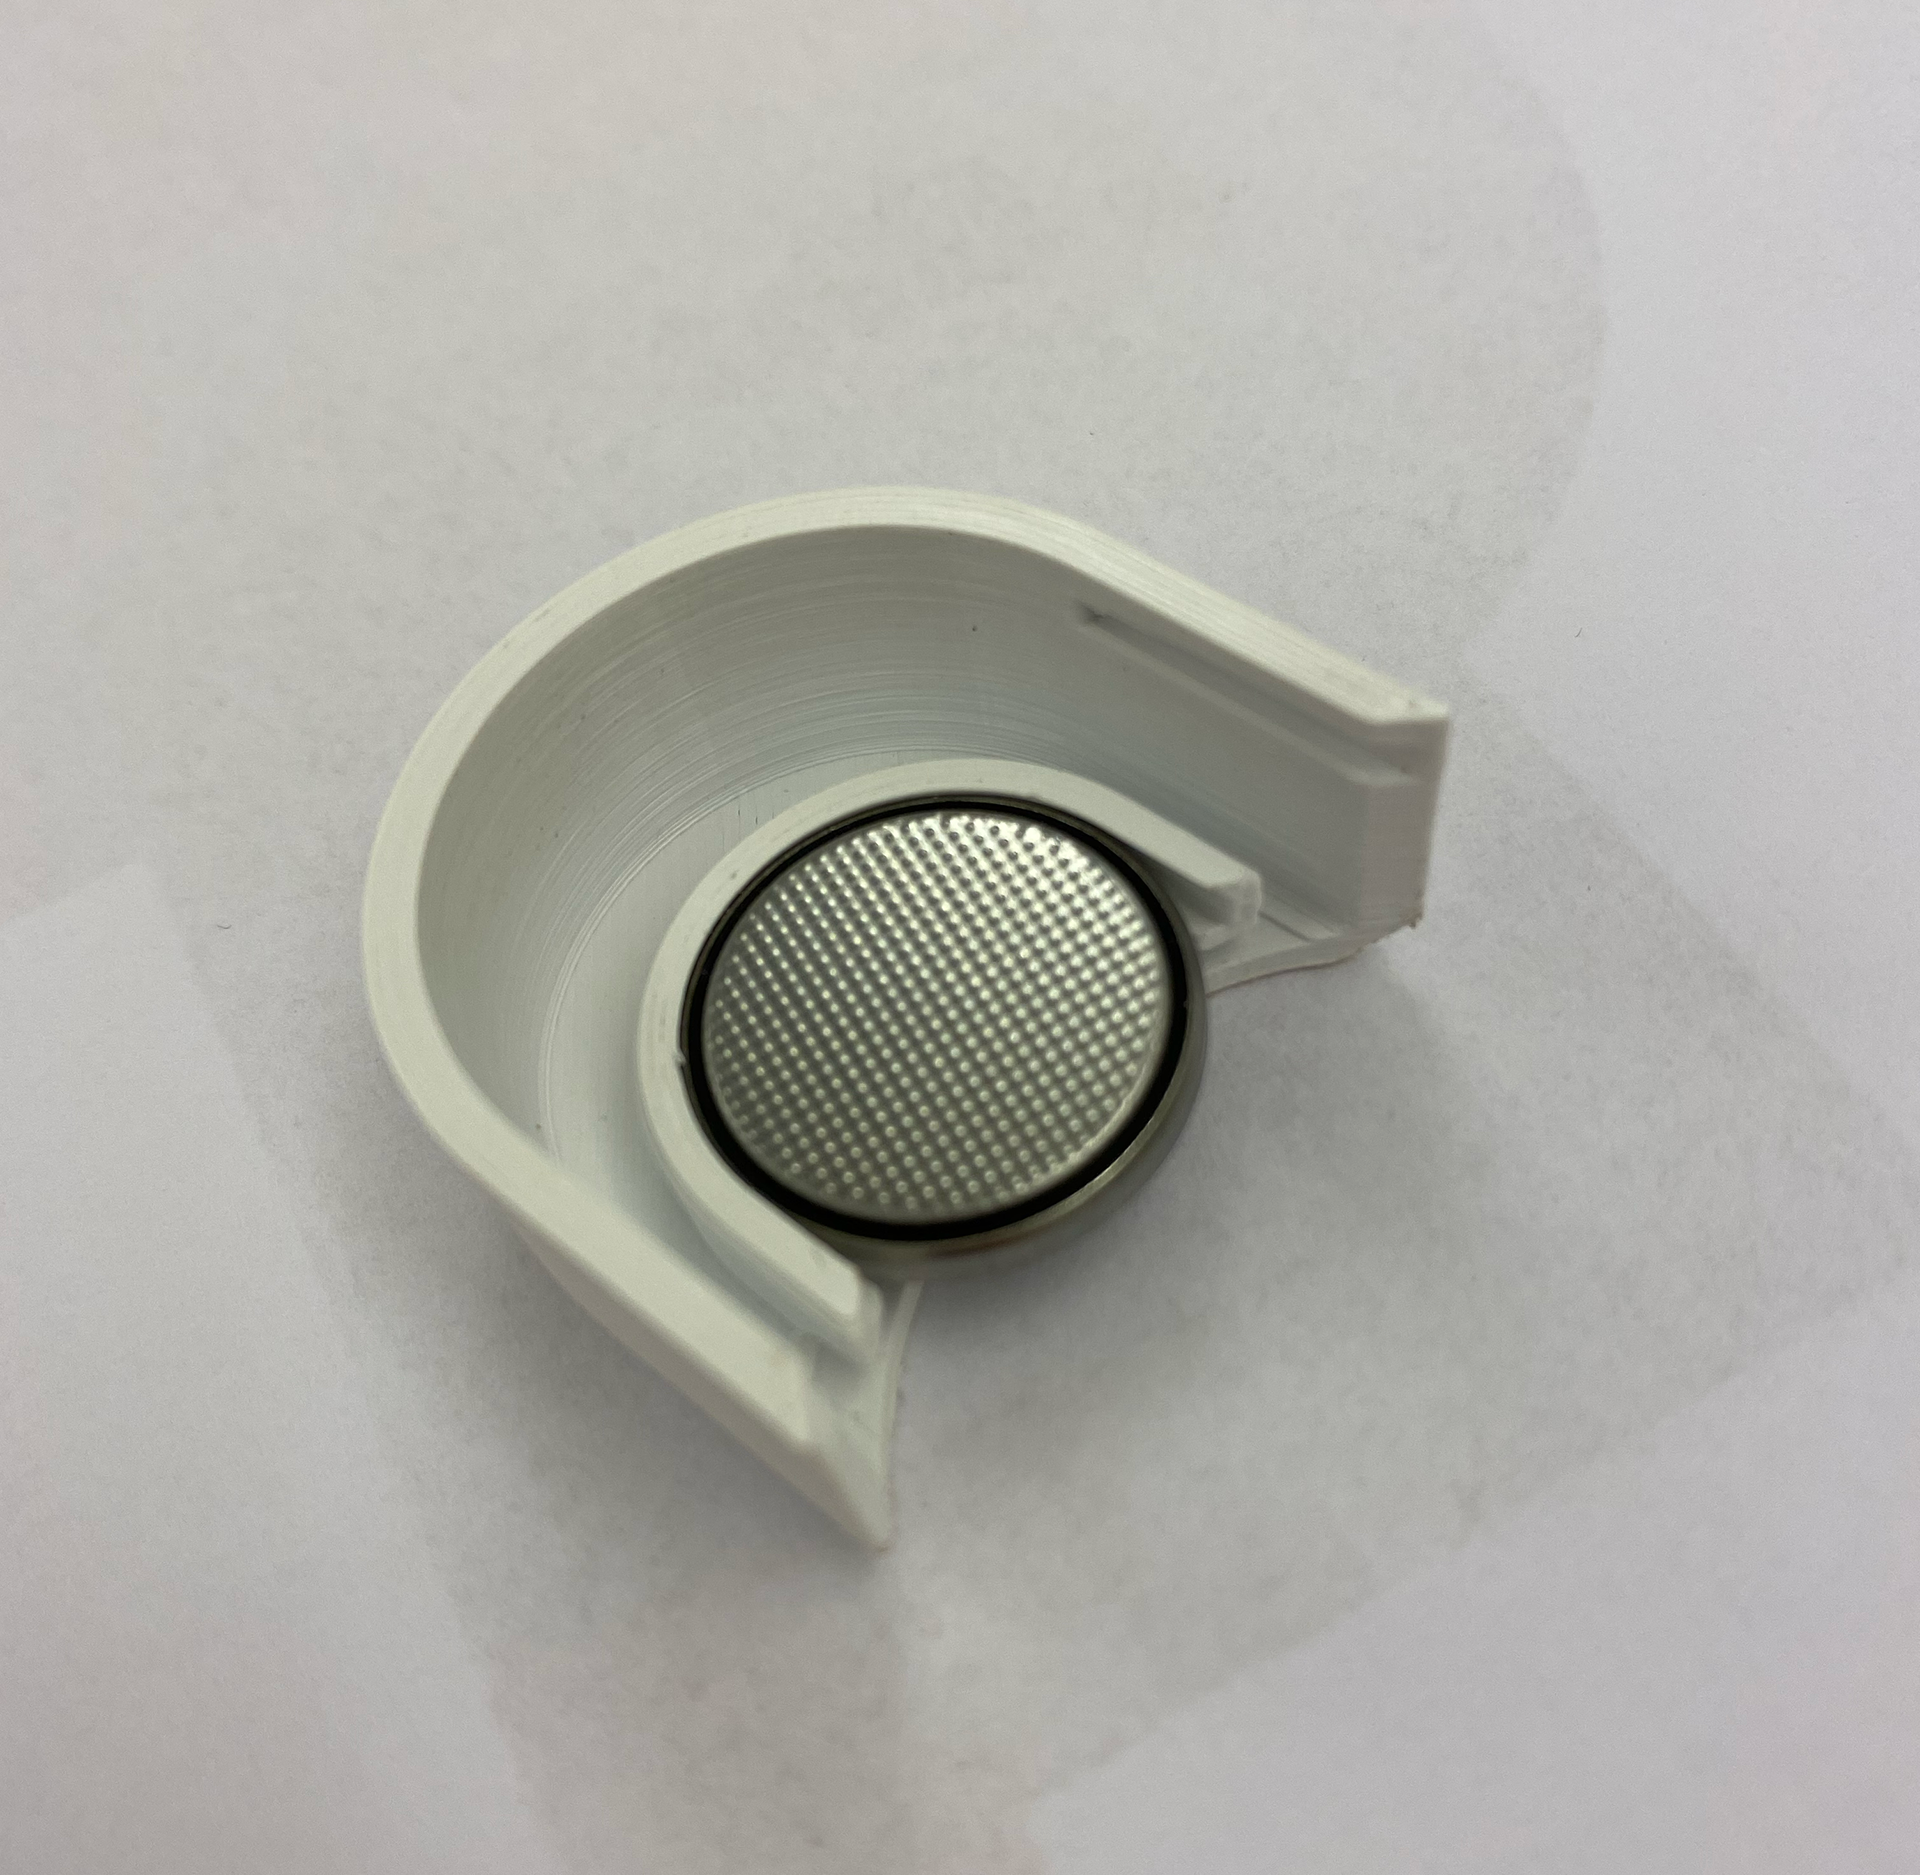
Now only fits the right way
Slide to change

"Down" text is elevated to support the perfect fit of the battery and metal parts of circuit board
Color schemes before concluding with a light beige for neutral look


Poster which says in Norwegian: Neutral on the wall, Dear in the heart. It also explains how the two buttons operate: hold the up or down button to quickly change the dimming of the light, and fine-tune in increments by pressing the buttons. To turn off hold the down button in to dim it to dark, or press both buttons simultaneously for instant dark.
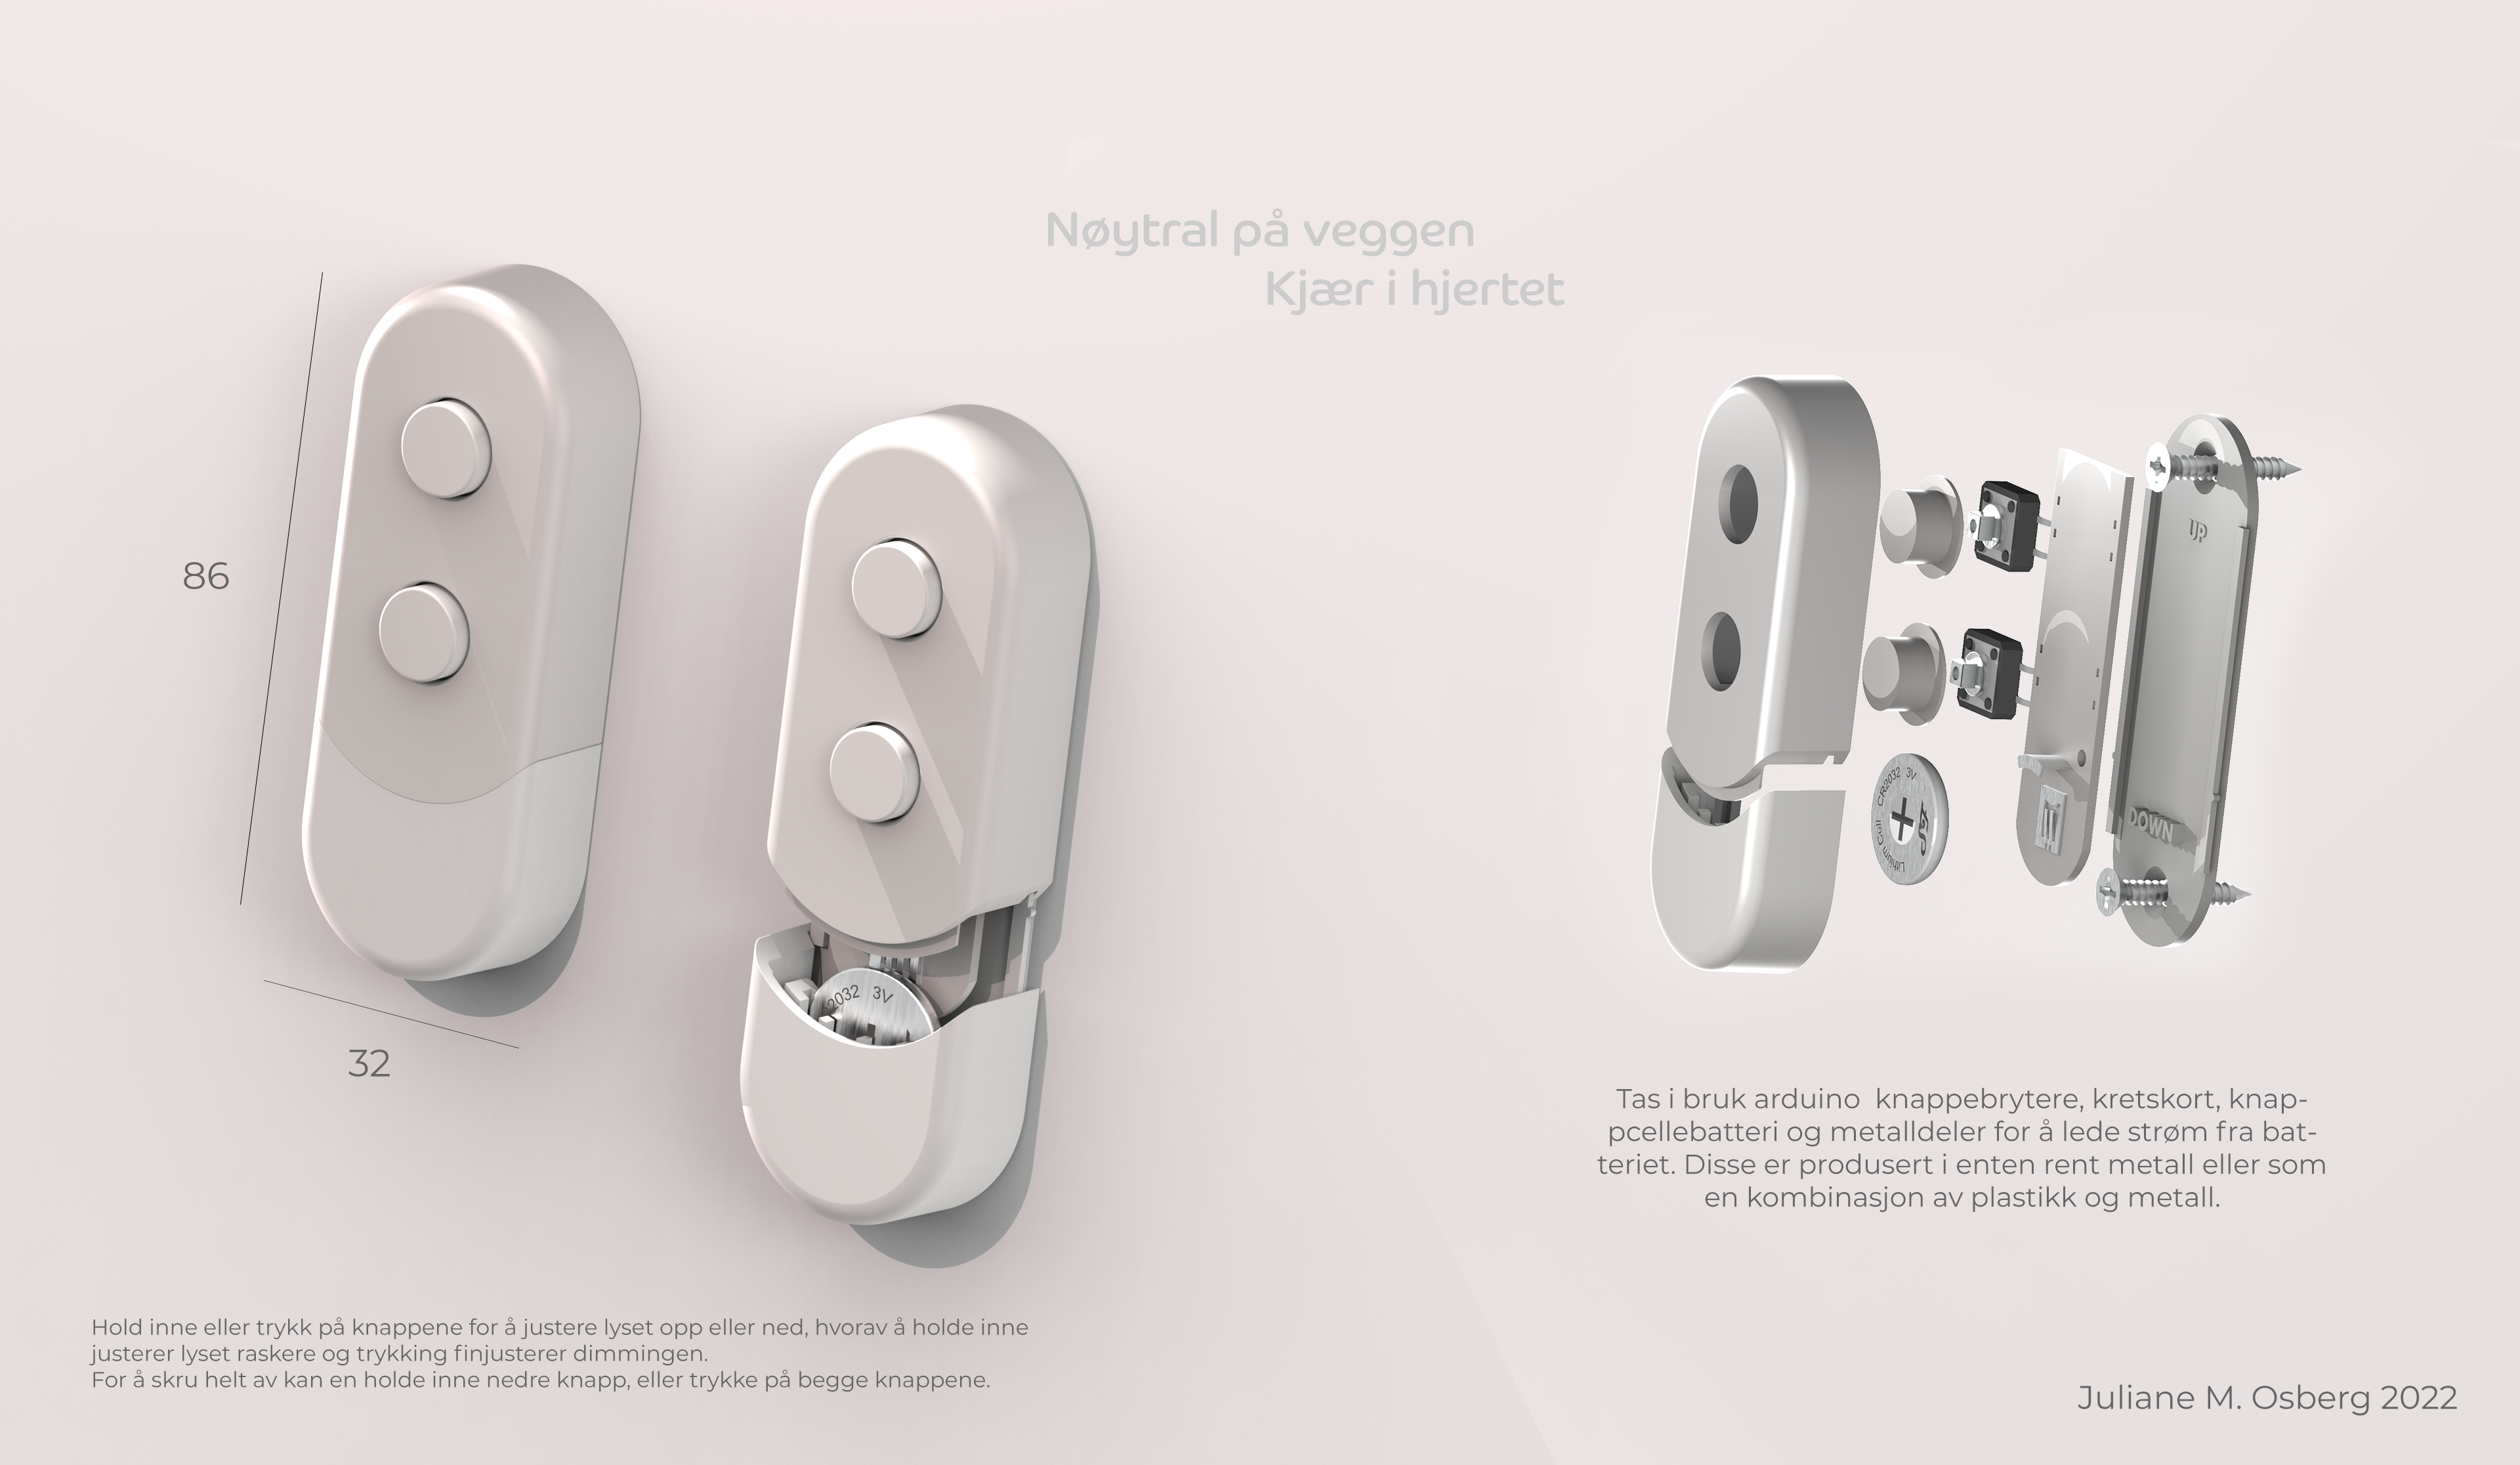
It also explains how I implemented Arduino button switches, a placeholder circuit board, a button battery and metal parts for conductivity.
This project taught me to fine-tune my designs for a snug fit which I wish you could test yourself, but it gave such a satisfying clicking sound and feel when sliding off and on the parts. Even though the design ended up resembling a doorbell, it kept its focus on simple battery changing without having to dismount the whole thing. It taught me a lot about 3D printing, which I carry with me now that I am create more advanced designs.